Has it been 6 days since my last post? Well I guess it has!
Here is my progress:
Exercise:
So far this week I have done a Zumba class, an Easy Does It class, 2 lower body weight workouts, 2 upper body weight workouts and I have walked 10 miles.
Food:
Not been as on point as I need to be but I am overall eating much better than I was in June and even July.
School has started back so the house has been a bit more empty with the boy driving himself plus working and band practices. The BabyGirl is working 2 jobs and pretty scarce too. This has given me a lot of time to re-prioritize myself and put me where I need to be on my list, which is at job one.
As moms and wives I think we get so busy taking care of everything and everyone else we lose sight of the more important fact: If we don't take care of ourselves then there is no one to take care of all the people and things we are so busy taking care of.
So this week was the first week of me first. My health, dietary needs and even down time, first. Everyone else has reached a place of self sufficiency enough that they can manage for the most part. My husband has been telling me this for a long time and it's time I listened.
So here's to good health, loving life, and Me First!
Saturday, August 23, 2014
Sunday, August 17, 2014
Worked out tonight. I think I'll die.
I lost 30lbs last summer and gradually about 12 of it slipped back up on me. I have been working at it and I only need to lose 7 more to get back to last summers low. So for now I am focusing on getting back to the gym.
Which I did today.
1.5 miles on the treadmill and a lower body workout on the weight machines. I know I will be feeling it tomorrow but that's ok. It's just upper body workout tomorrow along with some kind of cardio if I can get to it.
I read somewhere that sweating during a work out is your fat crying as it leaves.
Well my fat was having a hysterical, balling, squalling, nervous breakdown on the treadmill. I think that's either a good work out or the AC was not working properly at the gym.
Or I had the longest hot flash in my menopausal history to date.
Or all of the above.
I'm not sure.
Low carbed it today and it's hard to believe I lost 2 lbs since Friday after the get together at my house last night but those low carb pumpkin chocolate chip pistachio muffins and lemon blueberry bars really kept me from going face down in the chocolate peanut butter pie and the caramel cinnamon rolls.
Excited about the scale in the AM. Gym time again tomorrow and getting some more cooking done. [deviled eggs and spicy chicken soup with spinach/mushrooms and green onions]
RECIPE REVIEW: Blueberry Lemon Bars
Ok this recipe really went over big with low carbers and non low carbers alike. Most people kept asking if it had cream cheese in it, which it did not. It made a creamy layer under the fruit that made it seem like it did.
These are best served cold.
***TIP: Make zest from your lemon before you half it and juice it. If you don't have a lemon zester, then use a cheese grater.
Blueberry Lemon Bars
8 generous servings at 6.1 effective carb count (8.9 carbs - 2.8g fiber)
shortbread crust:
1 1/2 cups almond flour,
[ I used Bobs Red Mill ]
1/8 teaspoon Stevia powder (NuNaturals preferred, or Sweetleaf)
[I used half a cup of Erythitol [Health Food Store] and half a cup of Stevia in the Raw[el cheapo at Grocery Outlet]
1/4 teaspoon sea salt
[I used kosher salt]
6 Tablespoons butter, melted [or expeller-pressed coconut oil]
[I used regular butter, not margarine]
1/2 teaspoon almond extract
[oops, didn't have any. Used Vanilla extract]
Preheat oven to 350˚F. Mix all ingredients together in a small bowl with a fork. Press into a 9" pan and bake 10 - 15 minutes until the edges are slightly brown. [I used a 9inch round cake pan.]
Cool while you make the filling.
lemon filling:
4 eggs, organic, pastured preferred
[I used regular large eggs]
1 teaspoon organic lemon zest, finely chopped if necessary
[I used a zester to scrape the yellow off the outside of the lemon BEFORE I cut and juiced it. Had to chop it too.]
1/2 cup fresh lemon juice
[had to juice about 4-5 lemons]
1 teaspoon NuNaturals Stevia powder, or 1/2 teaspoon Sweetleaf (then more to taste)
[used one half cup erythitol and half cup stevia in the raw.]
1/2 cup almond flour,
[ I used Bobs Red Mill]
1 teaspoon baking powder
1 cup organic blueberries, washed and stems removed (raspberries would be a good sub in this recipe)
[I thawed 1 cup of frozen generic blueberries]
Beat eggs until fluffy. Add all the rest of the ingredients except the blueberries. Mix well. Set aside. Arrange blueberries over the crust as evenly as possible.
Then give the lemon mix a good stir and pour over blueberries. Bake (still at 350˚F) for 25- 30 minutes until set.
Give it a toothpick test by putting your toothpick in the center and making sure the toothpick comes out clean, with nothing sticking to it.
The edges will be slightly brown.
Cool on a wire rack for about 30 minutes, then transfer to refrigerator for about an hour.
I was so busy I forgot to take pictures. What I made didn't look as lovely as the pics in the link below but it tasted REALLY GOOD!
http://www.untilthethinladysings.blogspot.com/2010/08/gluten-free-low-carb-blueberry-lemon.html
RECIPE REVIEW: Pistachio, Pumpkin Chocolate Muffins
Made these for a get together at my house last night. I am not a fan of pistachios so I think I will up the sugar free chocolate a little and use walnuts next time. Also think it would rock with some sugar free cream cheese icing.
Almond flour is a bit pricey but if you are only baking for special get-togethers or occasions then it is worth it to have something so tasty that non low carbers are eating them.
Here is the recipe with my tweaks, the link to the original site is at the bottom
- 1 1/2 Cups Honeyville Almond Flour
- [I used Bobs Red Mill]
- 1/2 Cup Pumpkin Puree
- (I used store brand. Remember, pumpkin, not pumpkin pie filling.)
- 1/2 Cup Pistachios (Pre-salted)
- [Got them at Walmart]
- 1/2 Cup Erythritol
- [Got it at Olive Leaves Health Food Store]
- 2 Large Eggs
- 1/4 Cup Coconut Oil
- [Got it at Grocery Outlet on the cheap]
- 3 ChocoPerfection Dark Bars (or 90%+ Cacao Squares)
- [could not find these. Analyzed the picture and saw that they were 10grams each. I subbed 30grams of a Lily's Original stevia sweetened dark chocolate bar, 55% cocoa. They can be found at the cash register at Olive Leaves Health Food Store. They are 85grams each.and cost almost five bucks. Almost enough for 3 batches of muffinss]
- 2 tsp. Quality Vanilla
- 1 1/2 tsp. Cinnamon
- 1/2 tsp. Baking Soda
- 1/2 tsp. Apple Cider Vinegar
- 1/2 tsp. Nutmeg
- 1/2 tsp. Cloves
- 1/2 tsp. Ginger
- [I did not have the cloves. I subbed 1/2tsp of pumpkin pie spice. Not the same but hey, ya gotta do what you gotta do!]
- Preheat oven to 325F.
- In a mixing bowl, combine Almond Flour, Erythritol, Baking Soda, and Spices. Mix well.
- In a separate mixing bowl, combine Pumpkin Puree, Large Eggs, Coconut Oil, Vanilla, and Apple Cider Vinegar. Mix well.
- Stir the wet ingredients into the dry ingredients, starting off by pouring only 1/2 of the wet into the dry. Continue mixing until everything is combined.
- Chop the ChocoPerfection Bars (or high % cacao squares). Add the chocolate and Pistachios to the batter and fold them in.
- Divide out your batter between 8 Cupcake Liners.
- Bake for 25-30 minutes, or until golden brown.
They were sugar free, flour free and I believe gluten free, not that I watch my gluten intake. If you try them let me know what you think.
*They REALLY needed cream cheese frosting.
http://www.ruled.me/pistachio-pumpkin-chocolate-muffins/
Saturday, August 16, 2014
Sweetener Substitutes and Equivalents
Found a fantastic website that tells you how much stevia equals sugar, splenda, etc. If you are looking to bake goodies for a diabetic or low carber then you want to bookmark this site.
http://sneakykitchen.com/Glossary/sweetener-equivalents.htm
http://sneakykitchen.com/Glossary/sweetener-equivalents.htm
Friday, August 15, 2014
Pumpkin Sausage Soup--Great for Fall Weather!
This recipe is a low carb one but you would never know it.
It is spicy and rich. Everyone I've ever made it for had no idea it was low
carb til I told them. It's also very quick to make:
Pumpkin Sausage Soup
* 2 c mashed pumpkin (1 15 oz can)
* 4 c. chicken broth
* 1/2 c. minced onion
* 1 c. finely chopped mushrooms
* 1/2 c half and half mixed with 1/2 c water
* 1 clove garlic, minced
* 1 T Italian Seasoning
* 1/2 pound spicy Italian sausage
Brown sausage, drain,
and then add the onion, mushrooms, garlic and Italian seasonings. When the
sausage is browned, mix in the pumpkin. When combined stir in the broth and mix
well. Simmer 20-30 minutes. Stir in the milk and simmer on low another 10-15
min. Taste and add salt/pepper as needed.
Most people think ewww pumpkin and sausage? Well honestly i tastes more like a squash and sausage soup. There is nothing sweet about it. It is very unusual and if you tried it at least once you might be very surprised.
Marinated Beef Roast
Marinate this all day Saturday and put it in a "slow
oven" (low temp oven) at 225 degrees for 9 hours over night. Get up Sunday
morning before church, take it out, let it cool while you get ready for church
and put it in the fridge. Heat and eat later. SO GOOD!
It has awesome
flavor, super tender, is very simple to do and a favorite around here.
Marinated Beef Roast
14 ounce can of beef broth
1/3 cup soy sauce
1/4 cup lemon juice
1 tsp liquid smoke
2 cloves garlic, minced
3 lb beef roast
Combine the broth, soy sauce, lemon juice, liquid smoke and
garlic. I used a 9x13 Pyrex dish.
Marinate roast overnight (I let it sit 8 hrs, flipping it
once)
Bake roast with marinade, covered with foil at 325 degrees
2-3 hours. (I let it go the full 3)
Let it rest 10 minutes and slice, spoon pan juices over the
meat.
*You can also cook it at a lower temp (about 225)
overnight--8-10 hours.
The PrayFit Prayer
If you're reading this and you're a Christian you might be interested in this prayer that my dear friend Pam posted this morning.
It is from a FB page for the PrayFit movement/book. The slogan is this: Life is not about the body but our health is a means of praise.
Here is a link to their website and what they're about.
http://www.prayfit.com/aboutus/
I haven't bought the book yet but I have been following their twitter and FB page for a long time. I find their words to be both inspiring and encouraging.
Here is the prayer:
"Lord, please bless my workout. As I train my arms, let it remind me that I’m held tightly in Yours. As I work my legs, let it be only to follow you more closely. When I work my chest, may it be safely under a breastplate of righteousness. And when I hit my back, I’ll recall that I’ll never be attacked by surprise. And finally Lord, allow my beating heart to grow stronger, knowing that’s exactly where You live. Yes Lord, please bless my workout. I’m a temple, here to worship.
In Jesus’ name, I train, Amen."
Here is a link to their FB page:
https://www.facebook.com/officialprayfit/timeline
And their Twitter:
https://twitter.com/prayfit
Let me know if you have read the book yet and if so what you thought! All comments are welcome!
"In order to excel, you must be completely dedicated." - Willie Mays
Thursday, August 14, 2014
Italian Stuffed Mushrooms (My recipe--not a review of someone elses)
Italian Stuffed Mushrooms --------------------------------------------------------------------------------
Mushrooms of choices-(fresh not canned) I used white. Could use med portabellas or whatever cream cheese
Italian sausages
green onions
Italian seasoning
fresh minced garlic (I use it out of the jar)
garlic powder
butter
pepper salt
shredded cheese or sliced "white" cheese like provolone, mozzarella, muenster, butterkase...
Use each of these ingredients in the proportion that you like to your taste.
Preheat oven to 350 degrees
Wash mushrooms. Pull the stems out of the mushroom caps and set aside.Slice sausage skin lengthwise and scoop ground pork out and into a skillet. Cook on medium heat and break up into small pieces as you go.
While sausage is cooking chop mushroom stems and green onions. When sausage is done remove from skillet to drain and add onions, stems, and minced fresh garlic (to taste) Italian Seasoning, salt and pepper. Saute until stems are cooked thru.
start w/half a block of cream cheese and slice into small pieces. Add to skillet. As it melts stir in sausage a little at a time until you have the proportions you want. You may want to add more cream cheese and less sausage or vice versa. Make sure you have crumbled bigger pieces of sausage by hand before adding back in to cream cheese mixture.....
Let the mixture cool and then pack by hand into the caps. place the stuffed caps back into the pan and bake at 350 until they look a little crusty on top. Add shredded or sliced white cheese of your choice and bake until it melts. Serve hot.
[the fresh green stuff in one of the pics is oregano from my herb garden. I just decided to throw that in there.]


Zumba! Zumba! Zumba!
When you say Zumba three times fast it sounds like a war cry. In reality nothing could be farther from the truth for me.
This is the second time I've been back to Zumba in a very long time. It felt a lot like Deja Vu:
http://womantypingbadly.blogspot.com/2011/01/my-first-zumba-class-today.html
Man, I thought that clock hand would NEVER MOVE!
But it did and I am down 2 lbs today. That is most likely the combination of changing my eating and the exercise but I'll take it! Down 2 of 120lbs. 118 to go! 2/120
In the meantime, I'm going to post a fabulous low carb stuffed mushroom recipe. Check it out and let me know if you try it!
p.s. Just so you know, I do not look like the picture below when I Zumba:
Tuesday, August 12, 2014
Real Talk, Sometimes You Just Got To Have It!
Last May [2013] I got real serious about getting healthy and lost 30lbs from May to August. I sort of lost my way after that, even though I knew what I needed to do. For reasons I am unable to pin down, I simply would not or could not get back on track.
Today a dear friend of mine asked me what I did that summer that contributed to my success at that time.
Without hesitation I told her that I went to the gym every single day, I stopped napping, even on Sundays and because my energy levels went up, I was more active. As the weight began to come off I began to eat better because I wanted to take maximum advantage of the physical progress I was making.
Fast forward a year. I have gained back about 10 of it and should have been pretty close to goal by now.
What am I doing to contribute to my lack of success?
I rarely go to the gym.
I don't eat healthy.
My lifestyle is very inactive.
My internal dialogue has given up on it.
That's Real Talk. It's hard to look at but a relief to get out there. It's also my 46th birthday, today; and if I don't get on track soon I will live out my latter years in the poorest of health and have no one to blame but myself.
So today I am looking at my words and believing that next year at this time I will be writing about how much changed this year and what better health I am in.
^See that? That would be change one: my internal dialogue.
It's a start.
Comments are always welcome.
Here's to our health,
Robin
Sunday, August 10, 2014
Delicata Squash
DELICATA SQUASH YUM!
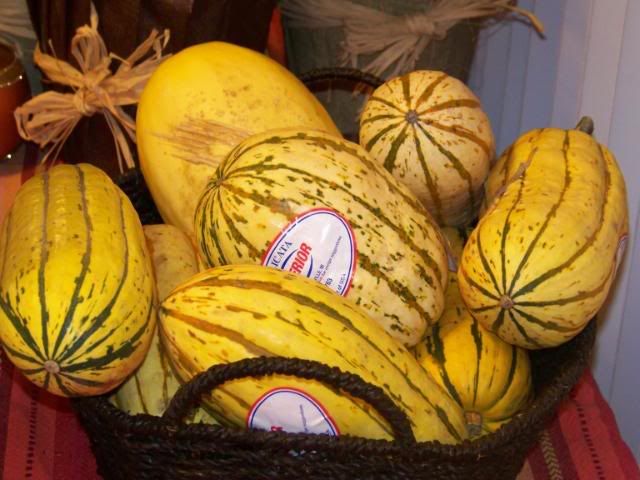
What are Delicata Squash? They are a mild buttery tasting almost sweet squash that is only in season in Florida around Sept/Oct. and sometimes Nov. They are a great low carb substitute for potatoes, especially as hash browns. In Panama City, Publix carries them and sometimes Walmart but not often @ Walmart.
One way of cooking Delicatas is to cut in half, scoop out pulp/seeds, and place cut side down in a microwave safe dish filled with a little water. Nuke until soft, scoop out and mash with butter, cinnamon, and sugar or Splenda. Another way is Squash Browns, recipe below :)
This is what they look like:
Squash Browns
Delicata Squashes (however many on all of the listed ingredients you decide lol)
Bacon
onions, diced
Mrs. Dash
Salt and pepper
Fry bacon til crisp, set aside. While the bacon is cooking, peel the squash then cut in half. scoops out seeds/junk. cube.
fry squash in bacon grease til almost done. toss in the onions, season with Das/salt/pepper. Finish cooking til done.
EAT.IT.UP.
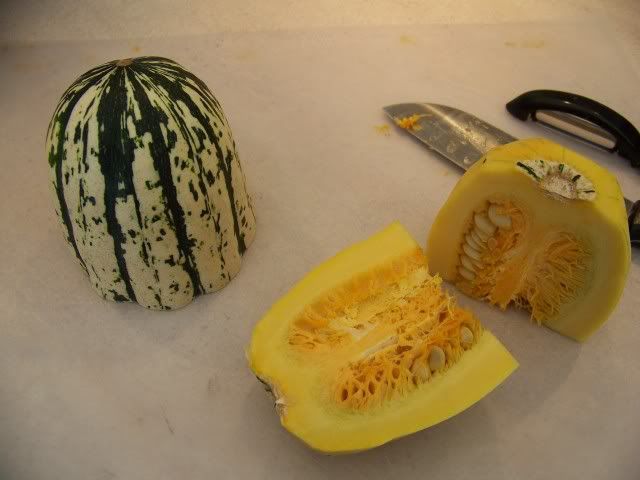
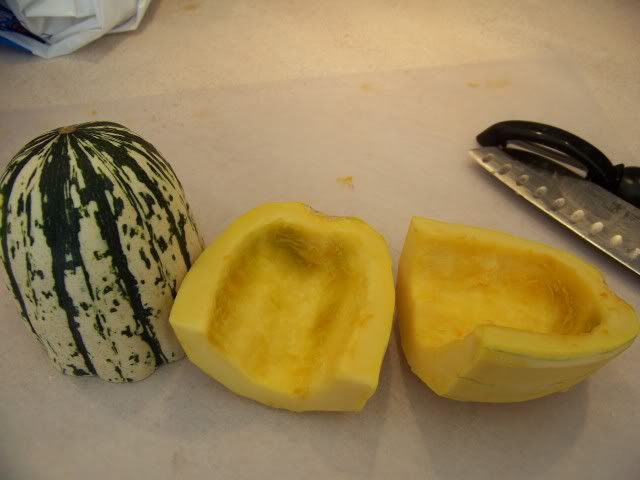
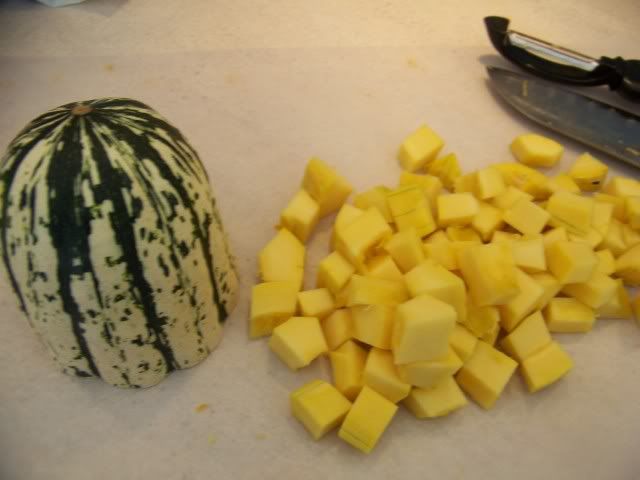
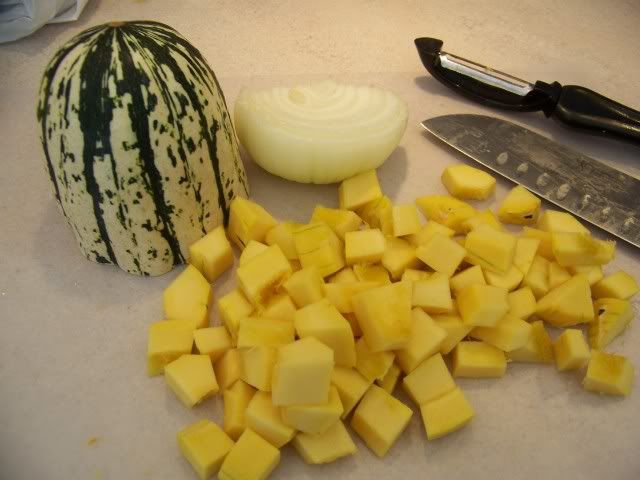
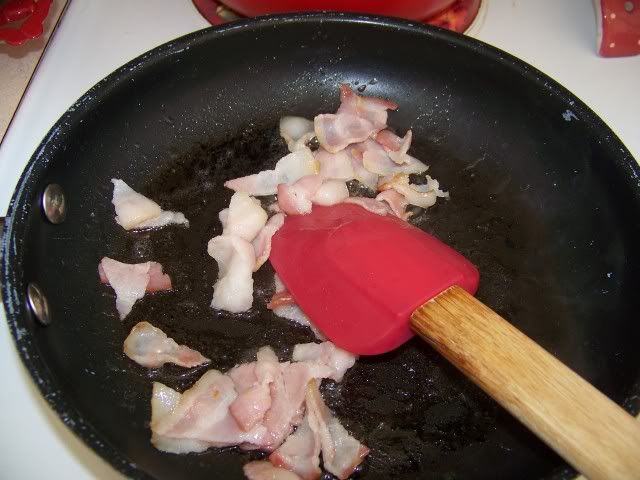
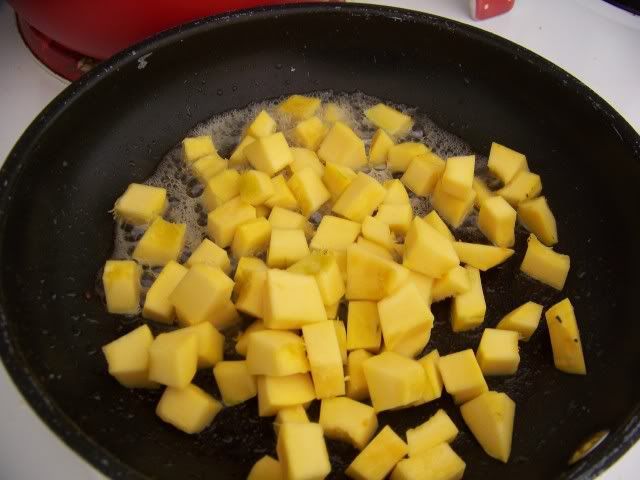
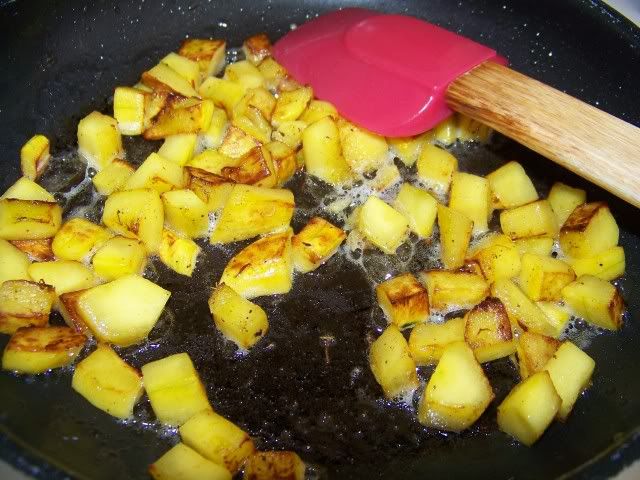
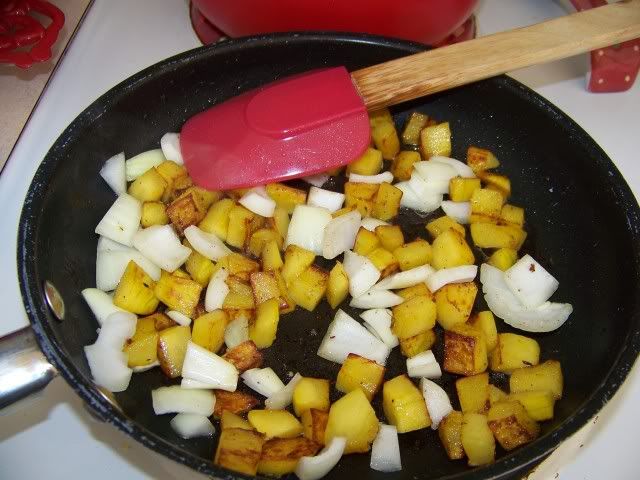
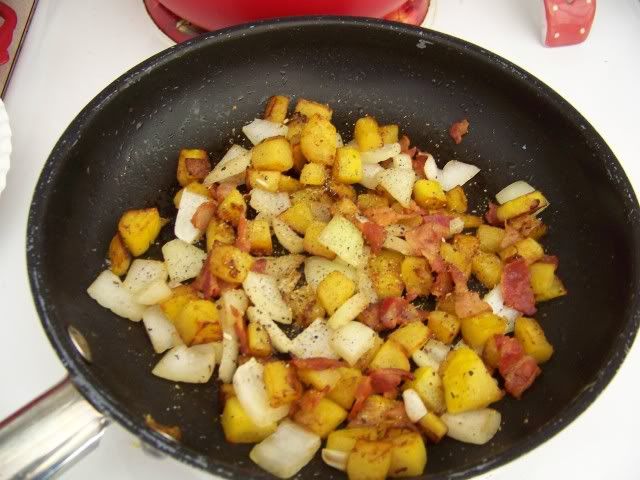
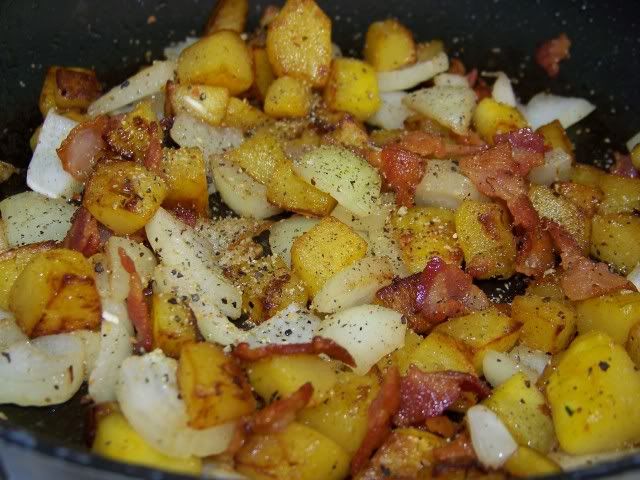
One way of cooking Delicatas is to cut in half, scoop out pulp/seeds, and place cut side down in a microwave safe dish filled with a little water. Nuke until soft, scoop out and mash with butter, cinnamon, and sugar or Splenda. Another way is Squash Browns, recipe below :)
This is what they look like:

Squash Browns
Delicata Squashes (however many on all of the listed ingredients you decide lol)
Bacon
onions, diced
Mrs. Dash
Salt and pepper
Fry bacon til crisp, set aside. While the bacon is cooking, peel the squash then cut in half. scoops out seeds/junk. cube.
fry squash in bacon grease til almost done. toss in the onions, season with Das/salt/pepper. Finish cooking til done.
EAT.IT.UP.


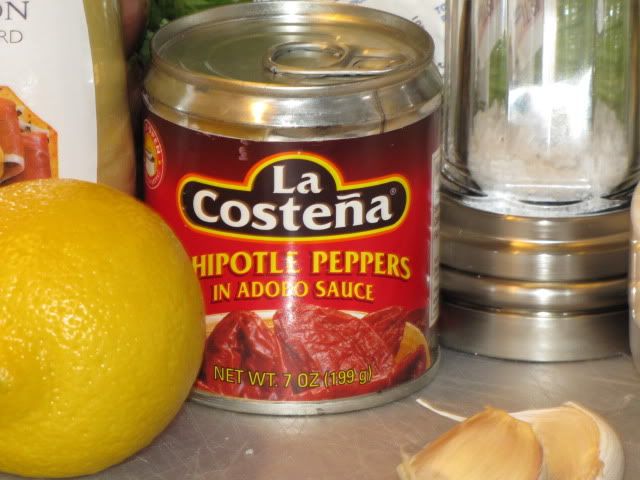
Recipe Review: Chipotle Wings
Chipotle Wings
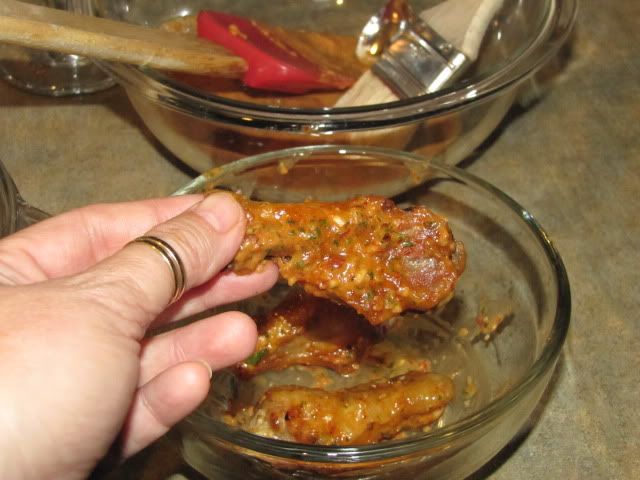
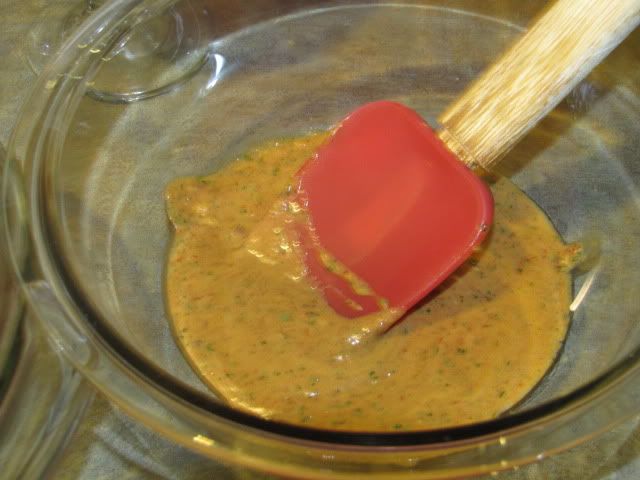
Chipotle Wing Sauce
2-3 cloves garlic
Juice from one lemon
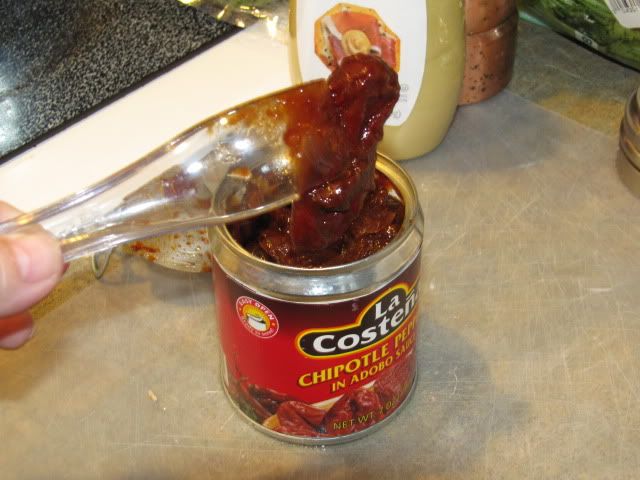
2-3 (or 4 if ya want it super spicy!) chipotle chiles in adobo + 2tablespoons adobo sauce
1 tablespoon Dijon mustard
2 tablespoons finely chopped fresh parsley or cilantro
1 tablespoon finely chopped fresh oregano
Salt and freshly ground black pepper
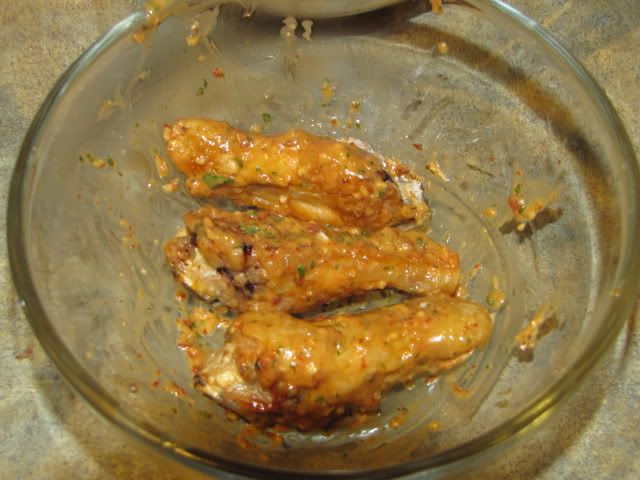
Put all in food processor or blender and blend until combined then drizzle in 1/2 stick melted butter or 1/4 cup good evoo while blending. Toss with 2lbs grilled wings.
I usually use 3 chipotle's, cilantro and evoo.
The recipe above is just as I got it from the girl who posted it.
These are my own notes:
the adobo sauce was so thick I could not get 2 tbsp out of it. I really liked the flavor of the adobo sauce so I wish I could have gotten more out of it.
The flavor was intense with heat but not flaming hot..... I would toss the wings in the sauce while the wings are still hot. They seemed to coat differently if the wings cooled some before I got them in the sauce. (I had three different kids of sauce going so I got delayed getting the wings into the sauce right away sometimes)
Still tasted good dipping these wings in ranch or bleu cheese like regular Frank's sauce.
The recipe does not make a whole lot of sauce but the girl who posted this said she can toss 2lbs of wings in what this recipe makes.
Texas Chili
Texas Chili
This recipe started as a recipe by a woman online named Dottie. I have changed it considerably so I am reposting here the version of it I now use:
1 pound ground beef
1 pound diced steak or stew meat
2 large yellow onions – diced
2 cans (14.5 ounce) cut diced tomatoes
2 cans (8 ounce) tomato sauce
2 cans (14 ounce) beef broth
3 teaspoons chili powder
1 teaspoon ground cumin
1 teaspoon garlic powder
1 teaspoon ground oregano
1 teaspoon paprika
2 teaspoon salt
2 teaspoon ground black pepper
Shredded Cheddar cheese
Sour Cream
Brown ground beef, steak and onions, breaking it up as you go. Drain well.
Add spices and continue to cook until meat is well coated.
Add the remaining ingredients.
Reduce heat, cover and simmer for at least 30 minutes or until reduced slightly.
Add water or more broth if needed.
Serve hot with shredded cheddar cheese and sour cream.
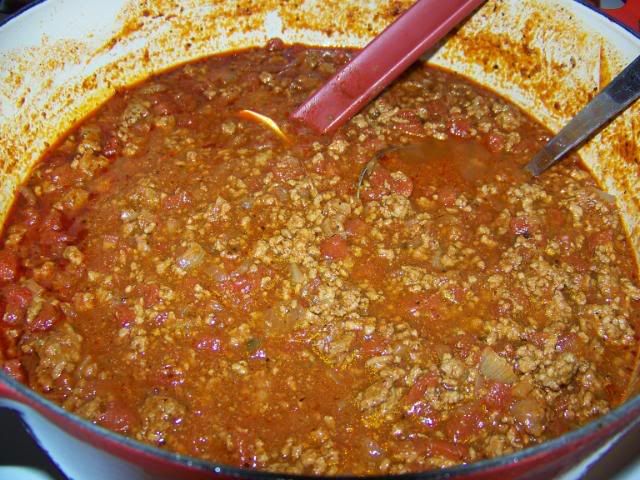
* I have made this recipe all the way to the meat/onions and seasonings then froze it. I packed it in a cooler, took the canned items with me and finished the chili about the 2nd or 3rd day we were camping. It is a great and consistent recipe.
1 pound ground beef
2 large yellow onions – diced
2 cans (14.5 ounce) cut diced tomatoes
2 cans (8 ounce) tomato sauce
2 cans (14 ounce) beef broth
3 teaspoons chili powder
1 teaspoon ground cumin
1 teaspoon garlic powder
1 teaspoon ground oregano
1 teaspoon paprika
2 teaspoon salt
2 teaspoon ground black pepper
Shredded Cheddar cheese
Sour Cream
Brown ground beef, steak and onions, breaking it up as you go. Drain well.
Add spices and continue to cook until meat is well coated.
Add the remaining ingredients.
Reduce heat, cover and simmer for at least 30 minutes or until reduced slightly.
Add water or more broth if needed.
Serve hot with shredded cheddar cheese and sour cream.

* I have made this recipe all the way to the meat/onions and seasonings then froze it. I packed it in a cooler, took the canned items with me and finished the chili about the 2nd or 3rd day we were camping. It is a great and consistent recipe.
Jalapeno Poppers
Jalapeno Poppers
Jalapeno Poppers
12 Jalapeno Peppers
8 oz Cream cheese, goat cheese or 4oz of both, softened to room temperature.
Shredded cheddar cheese
Real Bacon bits or fried crispy crumbled bacon slices, to your taste
Preheat oven to 400 deg
Split jalapeno peppers in half, remove membranes and seeds, rinse well, make sure nothing "white" remains in the shells. NOTHING unless you really like them HOT. Even one seed will fire your mouth up. Tips are below.
In a bowl mix 8 ounces cream/and or/goat cheese with a handful of the cheddar. The goal is to make a cheese filling that is somewhat stiff but still pliable by hand. Add more cheddar if it seems to need it. Then add the bacon bits to the bowl. You can mash it together with a fork or use your hands to mix it very well. I recommend using your hands myself.
Stuff mixture into peppers, you can use a spoon or do it by hand. I do it by hand. Messier but works better.I put the filling in so that it's not in a big mound but spread out so that the pepper is just slightly rounded on top when done.
Place stuffed peppers on a cookie sheet with a lip around the edge. They will roll out of a flat cookie sheet. Or use any other baking pan with sides. Top with a little bit of shredded cheddar on each pepper. Time consuming but if you just cover everything with cheese it does not work well to dip them in ranch. Then it becomes more knife and fork.....
Bake for about 20--30 minutes or until tender and just "almost" turning color...less time for less color if you like.
Let cool for 5-10 min. Dip in Ranch or Bleu cheese dressing and enjoy!
TIPS:
1. Sometimes I substitute cooked hot Italian sausage for the bacon bits.
2. I have scraped the peppers with a spoon and with my thumb under 4 layers of plastic gloves. The thumb worked better. The spoon just didn't do as good of a job. Less than 4 layers of glove and the oils from the peppers got into my nail bed and burned for several days.NOT.FUN. The peppers scraped with a spoon were also much hotter.
3. Do not work with the peppers bare handed. The oils are very difficult to wash from your skin and if you touch anything on your body [And MEN I mean ANYTHING] you will be sorry you did not wear gloves. I promise. Also do not handle your contact lenses if you did not wear gloves. OUCH. I keep a fingernail brush on my kitchen sink and scrub under my nails after wards too.Sometimes I go through 3 rounds of 4 gloves just to get them all scraped. As soon as the glove starts looking raggedy I change them.
4. I usually make a lot at one time and store them in a Ziploc bag in the fridge after they cool down. The cheese cools to a solid consistency and they just stack right up. Nuke the number you want to eat for 40sec. on a plate or so and they are like they just came out of the oven.
5. Change up the shredded cheese, the ingredients [bacon, sausage, etc] And even add spices if you like. I read one variation where they used spinach artichoke dip for a filling and they really liked it...
Recipe Review: PHILLY CHEESESTEAK STUFFED PEPPERS
Recipe Review: PHILLY CHEESESTEAK STUFFED PEPPERS
Found this at a wonderful blog, which I am linking to below. The pic on this blog is of the ones I made. I am pretty impressed with them. I did increase the seasoning as Bill and I love a lot of seasoning.
This recipe and many other low carb good ones can be found here:
http://peaceloveandlowcarb.blogspot.com/2012/06/philly-cheesesteak-stuffed-peppers.html#.Uc9YPW3m-AS
My Tweaks:
Pressed as much grease out of the meat mixture as possible before stuffing. It was super greasy.
Added shredded cheese in the middle of the meat mix layers
PHILLY CHEESESTEAK STUFFED PEPPERS
INGREDIENTS
8 oz. Thinly Sliced Roast Beef
8 Slices Provolone Cheese
2 Large Green Bell Peppers
1 Medium Sweet Onion – Sliced
6 oz. Baby Bella Mushrooms - Sliced
2 Tbs. Butter
2 Tbs. Olive Oil
1 Tbs. Garlic - Minced
Salt and Pepper - to taste
(2 Tbs. Peace and Love)
DIRECTIONS
Slice peppers in half lengthwise, remove ribs and seeds.
In a large sauté pan over low-medium heat, add butter, olive oil, garlic, mushrooms onions and a little salt and pepper. Sauté until onions and mushroom are nice and caramelized. About 30 minutes.
Preheat oven to 400°
Slice roast beef into thin strips and add to the onion/mushroom mixture. Allow to cook 5-10 minutes.
Line the inside of each pepper with a slice of provolone cheese. Fill each pepper with meat mixture until they are nearly overflowing. Top each pepper with another slice of provolone cheese.
Bake for 15-20 minutes until the cheese on top is golden brown.
Prep Time – 15 Minutes
Cook Time – 50 Minutes
Makes Servings: 4
Per Serving:
Calories – 458
Protein – 27 g
Carbs – 8.5 net g
Fat – 36 gThis recipe and many other low carb good ones can be found here:
http://peaceloveandlowcarb.blogspot.com/2012/06/philly-cheesesteak-stuffed-peppers.html#.Uc9YPW3m-AS
My Tweaks:
Pressed as much grease out of the meat mixture as possible before stuffing. It was super greasy.
Added shredded cheese in the middle of the meat mix layers
Recipe Review: Cilantro Grilled Chicken Breasts
Ingredients
1 pound (2 large breasts) boneless skinless chicken breast, butterflied
2 tablespoons canola oil
1/4 teaspoon kosher salt
1/8 teaspoon freshly ground black pepper
2 tablespoons
Cilantro Herb Butter, recipe follows
Fresh parsley, optional, for garnish
Directions
Preheat a grill or grill pan over high heat.
Lightly coat chicken with oil and sprinkle each evenly on both sides with the salt and pepper. Grill chicken breasts for about 4 to 5 minutes on each side, or until thoroughly cooked; the meat should be solid white throughout and the internal temperature will read 165 degrees F. Remove from grill and immediately top with cilantro herb butter. Garnish with parsley, if desired. Serve as butter is melting.
Cilantro Butter:Scampi Butter, recipe follows
2 tablespoons finely chopped fresh cilantro leaves
Follow the scampi butter recipe, but use only half of the garlic, and replace the parsley with 2 tablespoons minced fresh cilantro.
Yield: 12 servings
Scampi Butter (Base):1/4 pound unsalted butter, softened
1 tablespoon minced garlic
2 tablespoons minced red onion
1 tablespoon chopped fresh parsley leaves
1/2 teaspoon garlic powder
1/2 teaspoon kosher salt
1/4 teaspoon freshly ground black pepper
Dash white pepper
Dash Worcestershire sauce
1 lemon, juiced
1 tablespoon white wine
In a bowl, whisk all ingredients until thoroughly combined. Refrigerate until ready to use. Use the Scampi "base" to make different flavored butters.
Read more at: http://www.foodnetwork.com/
*My tweaks: My grilling abilities stink. Not only that, if I were actually good at it I would be too lazy to grill, lol. So I heat olive oil in a non stick pan over med-high heat, season the chicken and fry it in the olive oil til it browns, set aside and proceed with the butter.
Subscribe to:
Posts (Atom)


